Over the past several months, I have been slowly assembling the required components for a complete home filament recycling/extruding factory. This setup includes the following: a filament extruder, a filament winder, a plastics shredder, and a plastics dehydrator.
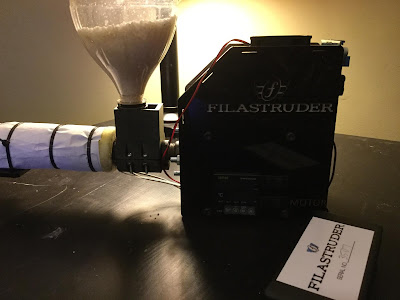
For the filament extruder, I acquired and assembled a filastruder branded machine kit. The only unique modification to this was the hole I drilled into the bottom of the hotend. This allows the filament to be extruded directly downward for easier usage in conjunction with the winder. I later removed this modification because there were some inconsistencies with extrusion width and I had realized that can still be used effectively with the winder in the horizontal position.

The dehydrator is a relatively cheap round food dehydrator that was found online. It is the perfect size for filament rolls and is also used for pellets. All I did was simply remove the center of each “shelf” to produce the hollow rings. These can then be added or subtracted depending on the size of the load.
My favorite (and definitely most fun) machine in this assemblage is the plastic shredder. I originally purchased a 10 sheet cross-cut paper shredder from a local Big-box store. I then proceeded to remove all the annoying safeties and locks. The result is a machine that is terrifyingly ravenous. It can easily shred most of my wasted or discarded print material (just as long as it isn’t 100% infill) and turn it into crumbs.
Initial shreddings are quite too large to run through the extruder, but after several times through the shredder, it starts to look like the images below.
All of these appliances work together to make a complete recycling loop in your (or in this case, my) own workspace. At the time of posting, I have not had much experience with this particular field and it is fairly new to me. The shredder and dehydrator work well, but the whole extruding process itself presented some challenges. For one, the filament I was extruding always seemed to come out grey. I have even poured in different types of pellets (fresh, non-recycled) and received pretty similar results. Width also varied considerably. Sometimes, the filament would come out slightly thinner than the required with and occasionally, it would force itself out with such pressure that it thickens to beyond the bore width.
I later solved most of these issues with time and tweaking. The filament still comes out grey, but far less than it used to be (this, as I have heard, is actually normal), and after some time to let the extruder push the inconsistencies out of the barrel, it is jamming way less than it used to be, and it is producing more consistent filament widths.
Throughout my troubles with the extruder, the winding process was quite consistent. Once I string up the filament, the winder can run consistently, keeping perfect time with the extruder and storing the final product neatly onto a spool of my choice.
This is a new technology for me, and that is precisely why I will be sharing my results and constant discoveries on this blog.
This is a new technology for me, and that is precisely why I will be sharing my results and constant discoveries on this blog.


